리눅스 서버에 여러 Python 버전이 존재할 때 원하는 버전을 사용하도록 설정하고 싶을 경우 update-alternatives를 이용하거나 직접 심볼릭 링크를 생성하여 버전 관리가 가능합니다.


우선 update-alternatives를 이용한 방법을 보겠습니다.


1. update-alternatives --config python 옵션은 python 버전 변경 시 사용하며 다음과 같은 에러가 발생할 경우 버전이 등록되어 있지 않은 것입니다.

sudo update-alternatives --config python
update-alternatives: error: no alternatives for python

2. 실행파일을 등록하는 명령어로 버전을 등록 시켜줍니다.

sudo update-alternatives --install /usr/bin/python python /usr/bin/python2.7 1
sudo update-alternatives --install /usr/bin/python python /usr/bin/python3.6 2

3. update-alternatives --config python 옵션으로 버전을 선택 후 적용된 버전을 확인합니다.


다음은 심볼릭 링크를 이용하여 버전관리를 해보겠습니다.


1. python이 실행되는 위치를 확인합니다.

which python


2. /usr/bin/python이 가리키는 버전 확인

3. 심볼릭 링크 생성

ln -s /usr/bin/pyton2.7 /usr/bin/python

4. 버전 확인

'프로그래밍 > Python' 카테고리의 다른 글

Python 공부 3일차(5장~6장)  (0) 2021.06.01
Python 공부 2일차(5장)  (0) 2021.06.01
Python 공부 1일차(1장~4장)  (0) 2021.05.30

비교 연산자

: True와 False는 표현식에서 바로 쓰이기 보다 표현식에서 생성 됨

: 비교 연산자로 비교를 수행한 후 생성하는 방식이 흔하게 사용 됨


기호 연산
> ~보다 크다.
< ~보다 작다.
>= ~보다 크거나 같다.
<= ~보다 작거나 같다.
== ~와 같다.
!= ~와 같지 않다.


배타적 논리합

: x와 y중 정확히 하나만 True여야 한다는 의미

b1 != b2


연산자 결합

: 산술 연산자는 비교 연산자보다 우선순위가 높음

: 비교 연산자는 불 연산자보다 우선순위가 높음

: 모든 비교 연산자는 서로 우선순위가 같음


단락 평가

: 불 연산자인 and나 or을 포함하는 표현식을 평가할 때 왼쪽부터 오른쪽으로 평가 도중에 평가한 정보가 충분하면 아직 평가하지 않은 피연산자가 있어도 평가를 멈춤

# 12/0 은 에러가 나는 표현식임

>>> ( 13 > 1 ) or ( 12 / 0 )
True​


문자열 비교

: 수를 비교하는 방식으로 문자열을 비교할 수 있음

: 문자열 내 문자는 정수로 표현되는데 미국 표준부호(ASCII)로 인코딩 되기 때문

: 모든 대문자가 모든 소문자보다 먼저 나오기 때문에 대문자보다 소문자가 더 큰 수


[ 사전순 ]                                                 

>>> 'D' < 'd'
True
>>> 'F' > 'a'
False
>>> 'kfc' < 'kfd'
True
>>> 'kfc' < 'kfcg'
True


[ 문자열 포함 여부 ]

: 대/소문자 구분

: 빈 문자열(' ')은 모든 문자열의 부분 문자열

>>> 'Good Boy' in 'you are a Good Boy'
True
>>> 'bird' in 'i am a bob'
False


# 빈 문자열
>>> '' in 'kfc'
True
>>> '' in ''
True


모듈


: 한 파일로 묶인 변수와 함수의 컬렉션을 모듈이라 함

: 한 모듈 내 변수와 함수는 어떤 식으로든 서로 연관되어 있음


모듈 Import

: 모듈 내 변수와 함수에 접근해서 사용하려면 Import를 해야함

: 모듈을 Import하면 모듈과 같은 이름의 변수가 생성 됨( 변수는 타입이 모듈인 객체 참조 )

import numpy

: 서로 다른 모듈이 같은 이름의 함수를 호출할 경우 마지막에 호출한 모듈의 함수로 대체됨

: 모듈 내 모든 요소를 Import하면 부정확한 함수에 접근하거나 올바르게 동작하지 않을 수 있음


* 파이썬은 모듈을 Import 하자마자 실행 하며 처음 Import할 때만 모듈을 로드하기 때문에 이미 목록에 있는 모듈을 로드하라는 요청이 들어오면 해당 요청을 건너뜀


모듈 전체 목록

: https://docs.python.org/release/3.6.0/py-modindex.html 참고


사용자 정의 모듈

: 코드를 .py 확장자 파일에 작성 후 저장하면 Import해서 재사용 가능


모듈 복구

: Import한 모듈의 변수나 함수의 값을 변경하고 셸을 재시작해 복구

: importlib 모듈의 reload함수를 사용해 모듈을 복구


* 시스템 모듈에는 동작하지 않음


Import할 때 실행할 코드 선택

: 한 모듈을 다른 모듈에서 Import하려면 두 모듈은 같은 폴더 내에 존재해야 함( 절대 경로를 쓰는 방법도 존재 )

: 모듈을 직접 실행할 때만 실행하고 Import할 때는 실행되지 않게 할 수 있음

: 모듈 내 특수 문자열 변수( __name__ )를 정의해서 구분함

# test.py 파일의 코드
print("__name__은", __name__)

# 실행하면 __name__변수를 생성하고 변수의 값이 __main__ 이므로 
# 해당 프로그램이 메인 프로그램을 뜻함
__name__은 __main__

# test.py를 Import하면 결과는
__name__은 test

'프로그래밍 > Python' 카테고리의 다른 글

[Python] Ubuntu Server Python 버전 변경  (0) 2023.02.01
Python 공부 2일차(5장)  (0) 2021.06.01
Python 공부 1일차(1장~4장)  (0) 2021.05.30

불 타입


불 연산자

- 기초 불 연산자는 not, and, or 3개로 not부터 차례로 우선순위가 높음

- ' ' 빈 문자열은 False고 그 외 모든 문자열은 True로 간주

not                                                                                     
>>> not True                  
# False
>>> not False 
# True

and
>>> True and True 		
# True
>>> False and False
# False
>>> True and False
# False
>>> False and True
# False

or
>>> True or True
# True
>>> False or False
# False
>>> True or False
# True
>>> False or True
# True


'프로그래밍 > Python' 카테고리의 다른 글

[Python] Ubuntu Server Python 버전 변경  (0) 2023.02.01
Python 공부 3일차(5장~6장)  (0) 2021.06.01
Python 공부 1일차(1장~4장)  (0) 2021.05.30

개요

- 특정한 규칙을 가진 문자열의 집합을 표현하는데 사용하는 형식 언어

- 코드가 간단하지만 표현식을 익히지 않으면 이해하기 어려움


표현 방법

- 다양한 정규표현식이 있으며, 약간의 차이점이 있지만 거의 비슷함

- 정규표현식에서 사용하는 기호는 Meta문자라고 함

  1. POSIX 정규 표현식
  2. PCRE(Perl 방식)
  3.  .....

공통 Meta문자

정규 표현식 설명
[xy] x,y중 하나를 찾음
[^xy] x,y를 제외한 문자를 찾음
[x-y] x부터 y 사이의 문자를 찾음
\^ ^를 식에 문자 자체로 포함
\b 문자와 공백 사이의 문자를 찾음
\B 문자와 공백 사이가 아닌 값을 찾음
\d 숫자를 찾음
\D 숫자가 아닌 값을 찾음
\s 공백 문자를 찾음
\S 공백이 아닌 문자를 찾음
\t Tab문자를 찾음
\v Vertical Tab 문자를 찾음
\w 알파벳 + 숫자 + _ 를 찾음
\W 알바벳 + 숫자 + _ 를 제외한 문자를 찾음
.(Any Character) 개행 문자를 제외한 모든 단일 문자에 해당
^(패턴시작) 해당 정규식이 줄의 시작 부분인지 확인
$(패턴 종료) 해당 정규식이 줄의 마지막 부분인지 확인


Flag 옵션

Flag 설명
g (global : 전역검색) 전역 플래그가 없이는 문자열 내의 최초 검색 결과를 반환하며, 옵션을 사용하면 문자열 내의 모든 검색 결과를 반환 받음
i  (대소문자 구분 없음) 정규식은 기본적으로 대/소문자 구분을 하는데 옵션을 사용하면 문자열의 대/소문자 구별하지 않음
m (MultiLine : 줄바꿈 검색) 문자열 행이 바뀌어도 찾음


참고

- https://wormwlrm.github.io/2020/07/19/Regular-Expressions-Tutorial.html


정규표현식 완전정복 - 재그지그의 개발 블로그

JavaScript를 활용하여 정규표현식의 기초부터 심화까지의 개념을 짚어봅니다.

wormwlrm.github.io

- http://www.ktword.co.kr/abbr_view.php?m_temp1=5851 


정규표현 메타 문자 [정보통신기술용어해설]


www.ktword.co.kr


OS

- 컴퓨터는 여러 하드웨어 제품을 포함하는데 이러한 장치들을 처리하기 위해 OS같은 운영체제를 실행

- 컴퓨터 내에서 하드웨어에 직접 접근할 수 있는 유일한 프로그램

- 예) 키보드에서 언떤 키가 눌렸는지, 저장소에서 데이터를 가져올 때 등 운영체제에 요청 


인터프리터/가상머신

- 프로그래머와 컴퓨터 하드웨어 사이에 계층을 두어 사용자의 프로그램을 넘겨받아 명령어를 OS가 이해하는 언어로

  바꾸면서 대신 실행

- OS상단에서 바로 프로그램을 작성하는 것 보다 더 쉽고 OS간 이식이 가능


인터프리터 사용법

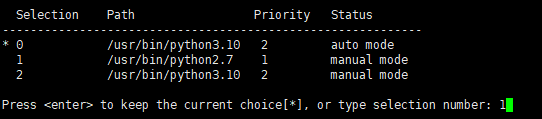
  1. 확장자가 .py인 파일에 저장된 파이썬 프로그램을 실행하라고 명령
  2. 셸 프로그램으로 한 번에 한 명령어씩 입력하면서 인터프리터와 상호작용

타입

- 피연산자가 int와 float면 파이썬은 자동으로 int를 float로 변환

- 실수를 쓸 때는 소수점 아래 0 생략 가능하지만 가독성을 위해 선호하지 않음

- 정수 나눗셈 결과를 올림하지 않고 가장 가까운 정수로 내림값을 반환

-17 // 10 # 1

- 음수 연산자에 %,//를 쓸 경우 정수 나눗셈 결과를 내림하기 때문에 결과가 음수면 결괏값은 예상 값보다 1 작음

-17 // 10 # -2

- 나머지 연산자를 사용할 때 결괏값의 부호는 두 번째 연산자의 부호를 따름

-17 % 10 # 3
17 % - 10 # -3

유한정밀도

- 빠른 계산과 메모리 효율성을 위해 한 숫자에 대해 저장하는 정보 용량을 제한함

- 작은 수부터 큰 수 순으로 더해서 오류 최소화


연산자 우선순위

- 우선순위가 낮은 표현식을 괄호()로 묶어 우선순위를 높여 적용


컴퓨터 메모리 

- 메모리 내 모든 위치는 집 주소처럼 고유한 식별 주소가 있음

- 정수와의 구별을 위해 identifier의 약자인 id 접두사를 사용해 id1, id2 처럼 표시

- 내장함수인 id를 이용해 실제 메모리 주소 확인 가능


오류

    1. 구문 오류(syntax error)

       :: 유효하지 않은 파이썬 코드를 입력했을 때 발생하는 오류

    2. 의미 오류(semantic error)

       :: 존재하지 않는 변수를 사용하는 등의 명령을 내렸을 때 발생하는 오류


긴 명령문

- 명령문이 길어지는 경우가 있는데 Python에서는 공백, 탭, 공백 문자를 포함해 한 줄에 최대 80개의 문자만 허용

- 하나의 명령문을 두 줄 이상에 표현하는 방법

  1. 괄호 안에서만 줄을 나눔
  2. 줄 연속 문자인 백슬래시(\) 사용

주석

- #을 이용해 주석문 사용


읽기 쉬운 코딩 작성

- 일관된 변수명 사용

- 적절한 공백을 사용해 읽기 쉽게 작성

# 프로그래밍 스타일 가이드 검색하면 다양한 예제가 있음


파이썬이 기억하고 재사용하는 객체

- Python 버전에 따라 작은 정수는 흔하기 때문에 처음 구동할 때 생성한 후 같은 객체를 재사용해 연산 속도 상승


변수


- 프로그램이 실행되면서 값이 변할 수 있는 수

- 대/소문자 구분

- 변수명은 철자와 숫자, 밑줄 기호를 사용해 변수명 생성

test-code! # 구두점 포함하고 있어 적절하지 않은 변수명
8test_code # 변수명은 숫자로 시작할 수 없음

- 변수에 값을 할당한 명령문을 할당문이라고 함

test_code = 13.5 # test_code 변수에 값 13.5를 할당
                 # test_code는 값 13.5를 참조

- 표현식에 변수가 나오면 그 변수가 참조하는 값으로 대체


지역변수

- 함수 내에서 생성한 변수

- 함수를 호출할 때마다 생성되며, 함수가 반환될 때 제거됨

- 함수 밖에서는 사용 불가


함수


내장함수

- abs, pow, round, int, float 같은 공통 연산을 수행하는 함수가 내장되어 있음


사용자정의 함수

- 사용자가 원하는 작업을 수행하기 위해 작성하는 함수


인수 

- 함수 호출 시 괄호 사이에 들어가는 표현식


반환 값

- 함수에서 연산을 마치고 호출한 곳으로 반환할 값

- return문이 없는 함수는 None을 반환


함수 호출 규칙

  1. 왼쪽부터 순서대로 한 번에 한 인수씩 평가
  2. 결괏값을 함수에 전달
  3. 함수를 실행하고 함수 호출이 끝나면 값을 생성

함수의 동작 확인

- help(함수명)을 호출해 함수에 대한 설명을 확인


키워드

- Python 내부에서 사용하려고 예약해둔 단어로 Python이 의도한 대로만 사용 가능

- 키워드는 함수명, 변수명으로 사용 불가

- 키워드 목록

False assert del for in or while
None break elif from is pass with
True class else global lambda raise yield
and continue except if nonlocal return  
as def finally import not try  

함수 덮어쓰기

- 같은 파일 안에 같은 함수명이 두 번 나올 경우 두 번째 함수가 덮어씀


네임스페이스

- 함수 호출을 실행할 때마다 그 호출에 쓰이는 지역변수를 저장할 임시 공간

- 함수가 반환될 때 제거됨


함수 디자인

  1. 첫 줄은 함수 헤더로 매개변수에는 함수에 전달할 저정보 타입을 표기하고, -> 뒤에 표기한 타입은 함수가 반환할 타입
  2. 문서화 문자열(""")을 사용해 함수가 호출될 때 어떤 일을 하는지 설명을 작성
  3. 함수의 예제와 반환값 표기
  4. 문서화 문자열 마침
  5. 함수 본문 

- 이러한 내용은 생략 가능

def test_function(x: int, y: int) -> int:
    """  # 문서화 문자열
       
       x와 y간 수의 차이 반환
       x와 y의 값은 0~200 사이의 값
     
   	   >>> test_function(1,3)
       2
       
    """
    return y - x

텍스트 처리


문자열 표현

- " 또는 '로 감싸서 표현

- 문서화 문자열은 "로 표현하도록 권장

- " 내에 '로 감싸진 문자 삽입 가능


문자열 결합

- 'test' + 'code' 처럼 +의 두 피연산자가 문자열이면 결합연산자라고 부름

'test' + 'code'
>>> 'test code'


- * 연산자를 이용해 문자열 반복

'test' * 3
>>> 'testtesttest'

# 정수가 0이하일 경우 빈 문자열 생성
'test' * 0
>>> ''

탈출 문자열

- 백슬래시를 탈출문자라고 하며, 탈출문자에 작은따옴표를 합친 부분을 탈출 문자열이라 부름

탈출 문자열 설명
\' 작은따옴표
\" 큰따옴표
\\ 백슬래시
\t
\n 새 줄
\r 캐리지 리턴


출력

- print함수를 이용해 메시지 출력

- 색, 글자체 등의 스타일 일체 허용하지 않음

- 키워드 매개변수인 sep를 사용해 각 값을 구분할 구분자 지정

- 키워드 매개변수인 end를 사용해 새 줄에서 시작하지 않고 빈 문자열로 끝내라고 하는 등 지정


정보 받기

- 내장함수인 input 함수를 사용해 입력 받을 수 있음

- 입력된 내용은 무조건 문자열로 반환

input_text = input()
>>> 입력된 문자열

# 숫자 입력받아 int형 변환
input_number = int(input())
>>> 입력된 숫자


'프로그래밍 > Python' 카테고리의 다른 글

[Python] Ubuntu Server Python 버전 변경  (0) 2023.02.01
Python 공부 3일차(5장~6장)  (0) 2021.06.01
Python 공부 2일차(5장)  (0) 2021.06.01

<내부>


1
2
3
4
5
6
7
8
9
10
11
12
13
14
String resource = "resource/db.properties";
        Properties properties = new Properties();
 
        try{
            Reader reader = Resources.getResourceAsReader(resource);
            properties.load(reader);
 
            System.out.println(properties.getProperty("spring.datasource.username"));
            System.out.println(properties.getProperty("spring.datasource.password"));
            System.out.println(properties.getProperty("spring.datasource.url"));
            System.out.println(properties.getProperty("spring.datasource.driverClassName"));
        }catch(IOException e){
            e.printStackTrace();
        }


<외부>

:: .jar와 같은 폴더 내면 db.properties만 적어주면 되는데 그게 아니라면 상대경로 또는 절대경로를 적어준다.


1
2
3
4
5
6
7
8
9
10
11
12
13
FileReader resource = new FileReader("db.properties");
        Properties properties = new Properties();
 
        try{
            properties.load(resource);
 
            System.out.println(properties.getProperty("spring.datasource.username"));
            System.out.println(properties.getProperty("spring.datasource.password"));
            System.out.println(properties.getProperty("spring.datasource.url"));
            System.out.println(properties.getProperty("spring.datasource.driverClassName"));
        }catch(IOException e){
            e.printStackTrace();
        }


'프로그래밍 > Spring' 카테고리의 다른 글

intellij Spring MVC & Gradle 프로젝트 생성  (0) 2020.05.22
Spring MVC & Gradle & Mariadb 연동  (0) 2020.05.21
Spring_AOP  (0) 2020.05.20
SpringMVC_Annotation  (0) 2020.05.20
파일 다운로드  (0) 2018.10.24

1. gradle 선택 -> java, web 체크 

2. build.gradle에 소스 추가

1
2
3
4
5
apply plugin: 'war'
 
providedCompile 'javax.servlet:servlet-api:2.5'
    compile 'org.springframework:spring-webmvc:5.0.6.RELEASE'
    runtime 'javax.servlet:jstl:1.1.2'


3. webapp 아래에 web.xml, dispatcher-servlet.xml, applicationContext.xml 파일 생성 & views폴더 생성 후 index.jsp파일 이동


<web.xml>

<?xml version="1.0" encoding="UTF-8"?>
<web-app xmlns="http://xmlns.jcp.org/xml/ns/javaee"
xmlns:xsi="http://www.w3.org/2001/XMLSchema-instance"
xsi:schemaLocation="http://xmlns.jcp.org/xml/ns/javaee http://xmlns.jcp.org/xml/ns/javaee/web-app_4_0.xsd"
version="4.0">
<context-param>
<param-name>contextConfigLocation</param-name>
<param-value>/WEB-INF/applicationContext.xml</param-value>
</context-param>
<listener>
<listener-class>org.springframework.web.context.ContextLoaderListener</listener-class>
</listener>

<servlet>
<servlet-name>dispatcher</servlet-name>
<servlet-class>org.springframework.web.servlet.DispatcherServlet</servlet-class>
<init-param>
<param-name>contextConfigLocation</param-name>
<param-value>/WEB-INF/dispatcher-servlet.xml</param-value>
</init-param>
<load-on-startup>1</load-on-startup>
</servlet>
<servlet-mapping>
<servlet-name>dispatcher</servlet-name>
<url-pattern>/</url-pattern>
</servlet-mapping>
</web-app>

< dispatcher-servlet.xml >

1
2
3
4
5
6
7
8
9
10
11
12
13
14
15
16
17
<?xml version="1.0" encoding="UTF-8"?>
<beans xmlns="http://www.springframework.org/schema/beans"
       xmlns:xsi="http://www.w3.org/2001/XMLSchema-instance"
       xmlns:context="http://www.springframework.org/schema/context"
       xmlns:mvc="http://www.springframework.org/schema/mvc"
       xsi:schemaLocation="http://www.springframework.org/schema/beans 
        http://www.springframework.org/schema/beans/spring-beans.xsd 
        http://www.springframework.org/schema/context http://www.springframework.org/schema/context/spring-context.xsd 
        http://www.springframework.org/schema/mvc http://www.springframework.org/schema/mvc/spring-mvc.xsd">
 
    <mvc:annotation-driven />
    <context:component-scan base-package="com.spring.controller" />
    <bean class="org.springframework.web.servlet.view.InternalResourceViewResolver">
        <property name="prefix" value="/WEB-INF/views/"/>
        <property name="suffix" value=".jsp"/>
    </bean>
</beans>


<applicationContext.xml >

<?xml version="1.0" encoding="UTF-8"?>
<beans xmlns="http://www.springframework.org/schema/beans"
xmlns:xsi="http://www.w3.org/2001/XMLSchema-instance"
xsi:schemaLocation="http://www.springframework.org/schema/beans http://www.springframework.org/schema/beans/spring-beans.xsd">

</beans>

4. projectStructure에서 artifacts 추가

5. 톰캣 설정

6. index.jsp과 JdbcController.java 생성


< index.jsp >

1
2
3
4
5
6
7
8
9
10
11
12
13
14
15
16
17
18
<%--
  Created by IntelliJ IDEA.
  User: choej
  Date: 2020-05-22
  Time: 오후 2:48
  To change this template use File | Settings | File Templates.
--%>
<%@ page contentType="text/html;charset=UTF-8" language="java" %>
<html>
  <head>
    <title>$Title$</title>
  </head>
  <body>
  ${msg}
 
  </body>
</html>


< JdbcController.java >


1
2
3
4
5
6
7
8
9
10
11
12
13
14
15
16
17
18
19
20
21
22
23
24
25
26
package com.spring.jdbc;
 
import java.sql.*;
 
public class JdbcController {
    public static void main(String[] args) {
        try {
            Connection conn = DriverManager.getConnection(
                    "jdbc:mariadb://localhost:3306/project",
                    "eunbajaeba",
                    "qw0e7r2t2!"
            );
 
            Statement stmt = conn.createStatement();
            ResultSet rs = stmt.executeQuery(
                    "select * from t_member"
            );
 
            while (rs.next()) {
                System.out.println(rs.getString(1));
            }
        } catch (SQLException e) {
            e.printStackTrace();
        }
    }
}


'프로그래밍 > Spring' 카테고리의 다른 글

Properties파일 읽기  (0) 2020.05.22
Spring MVC & Gradle & Mariadb 연동  (0) 2020.05.21
Spring_AOP  (0) 2020.05.20
SpringMVC_Annotation  (0) 2020.05.20
파일 다운로드  (0) 2018.10.24

1. https://mvnrepository.com/artifact/org.mariadb.jdbc/mariadb-java-client/2.6.0 에서 gradle탭의 코드복사

2. build.gradle의 dependencies 내부에 복사한 코드 붙여넣기

3. class에서 db연결을 만들어 확인해보기


'프로그래밍 > Spring' 카테고리의 다른 글

Properties파일 읽기  (0) 2020.05.22
intellij Spring MVC & Gradle 프로젝트 생성  (0) 2020.05.22
Spring_AOP  (0) 2020.05.20
SpringMVC_Annotation  (0) 2020.05.20
파일 다운로드  (0) 2018.10.24

[ AOP( Aspect Oriented Programming ]

:: Spring이 아니고 방법론 AOP를 구현할때 Spring이 도움을 준다. 

:: 주 업무로직 외에 사용자가 모르는 개발자나 운영자가 개발이나 운영을 위해서 만든 부가적인 코드들이 있다

그래서 관점에 따라서 나누어 만들게 된다.

::관점들에 대해서 분류하고 결합을 어떻게 해야할지의 방법론

:: 주 업무로직의 처음 끝 부분에 로그,보안,트랜잭션처리 등을 넣지 않고

프록시처럼 만들어 이걸 통해서 사용하도록 만드는 것.

:: java만으로도 구현 가능


[Core Concern]

:: 주 업무로직 


[Corss-cutting Concern]

:: 로그처리, 보안처리, 트랜잭션처리 등등..


[ Spring 을 사용하지 않고 AOP 작성 ]


< 과거 로직 >

1
2
3
4
5
6
7
8
9
10
11
12
13
14
15
16
17
18
19
20
21
public class JavaExam Implements Exam{
    public int total(){
 
    long start = System.currentTimeMillis();
    SimpleDateFormat dayTime = new SimpleDateFormat("yyyy-mm-dd hh:mm:ss");
    String str = dayTime.format(new Date(start));
    /* ------------------------------------- */
        
 
    int result = kor + eng + math + com;
 
    /* ------------------------------------- */
 
    long end = System.currentTimeMillis();
    String message = (end-start)+"ms가 걸림";
    System.out.println("message"); 
 
 
        return result;
    }


< AOP 로직 >


1
2
3
4
5
6
7
8
9
10
11
12
13
14
15
16
17
18
Exam proxy = (Exam) Proxy.newProxyInstance(
                JavaExam.class.getClassLoader()
                , new Class[]{Exam.class}
                , new InvocationHandler(){
 
            /*      Corss-cutting Concern        */
 
 
    public Object invoke(Object proxy, Method method, Object[] args) throws Throwable{
 
            /*      Corss-cutting Concern        */
        return null;
    
    }
    int total = proxy.total();
    float avg = proxy.avg();
 
});


1
2
3
4
5
6
7
8
9
10
11
12
13
14
15
16
17
18
19
20
21
22
23
24
25
26
27
28
29
30
31
32
33
34
35
36
37
38
package spring.aop;
 
import jdk.jshell.execution.LoaderDelegate;
import spring.aop.entity.Exam;
import spring.aop.entity.NewlecExam;
 
 
import java.lang.reflect.InvocationHandler;
import java.lang.reflect.Method;
import java.lang.reflect.Proxy;
 
public class Program {
 
    public static void main(String[] args){
 
        Exam exam = new NewlecExam(1,1,1,1);
 
//여기부터

        Exam proxy = (Exam) Proxy.newProxyInstance(NewlecExam.class.getClassLoader(),
                new Class[]{Exam.class},
                new InvocationHandler() {
            @Override
            public Object invoke(Object proxy, Method method, Object[] args) throws Throwable {
 
                long start = System.currentTimeMillis(); // 곁다리
 
                Object result = method.invoke(exam,args);// 첫번째 파라미터는 업무 객체
// 주 업무 로직
 
                 long end = System.currentTimeMillis(); // 곁다리
 
                 String message = (end - start) + "ms 시간이 걸렸습니다.";
                 System.out.println(message);
                return result;
            }
        });
//여기까지
        System.out.printf("total is %d\n",exam.total());
    }
}
 

cs


[ Spring 을 사용하고 AOP 작성 ]


<보조업무 형태>

:: 원하는 업무형태를 인터페이스 상속받아 구현해서 넣으면 aop프로그램이 됨


@ Controller

1
2
3
4
5
6
7
8
9
10
11
12
13
14
15
16
17
18
19
20
package spring.aop;
 
import org.springframework.context.ApplicationContext;
import org.springframework.context.support.ClassPathXmlApplicationContext;
import spring.aop.entity.Exam;
 
public class Program {
 
    public static void main(String[] args){
 
        ApplicationContext context =
                new ClassPathXmlApplicationContext("setting.xml");
 
        
        Exam proxy = (Exam) context.getBean("proxy");
        System.out.printf("total is %d\n",proxy.total());
        System.out.printf("avg is %f\n",proxy.avg());
       
    }
}


@ XML

1
2
3
4
5
6
7
8
9
10
11
12
13
14
15
16
17
18
19
20
<?xml version="1.0" encoding="UTF-8"?>
<beans xmlns="http://www.springframework.org/schema/beans"
       xmlns:xsi="http://www.w3.org/2001/XMLSchema-instance"
       xmlns:p="http://www.springframework.org/schema/p"
       xmlns:context="http://www.springframework.org/schema/context"
       xsi:schemaLocation="http://www.springframework.org/schema/beans 
http://www.springframework.org/schema/beans/spring-beans.xsd">
 
    <bean id="target" class="spring.aop.entity.NewlecExam" p:kor="1" p:eng="1" p:math="1" p:com="1" />
    <bean id="logAroundAdvice" class="spring.aop.LogAroundAdvice"/>
    <bean id="proxy" class="org.springframework.aop.framework.ProxyFactoryBean">
        <property name="target" ref="target"/>
        <property name="interceptorNames">
            <list>
                <value>logAroundAdvice</value>
            </list>
        </property>
    </bean>
 
 
</beans>


1. Around Advice

:: 앞,뒤 모두 보조업무


1
2
3
4
5
6
7
8
9
10
11
12
13
14
15
16
17
18
19
20
package spring.aop;
 
import org.aopalliance.intercept.MethodInterceptor;
import org.aopalliance.intercept.MethodInvocation;
 
public class LogAroundAdvice implements MethodInterceptor {
 
    @Override
    public Object invoke(MethodInvocation invocation) throws Throwable {
 
        long start = System.currentTimeMillis();
 
        Object result = invocation.proceed(); // 주 업무 호출
 
        long end = System.currentTimeMillis();
        String message = (end - start) + "ms 시간이 걸렸습니다.";
        System.out.println(message);
        return result;
    }
}


2. Before Advice

:: 앞부분만 보조업무


1
2
3
4
5
6
7
8
9
10
11
12
13
14
package spring.aop;
 
import org.springframework.aop.MethodBeforeAdvice;
 
import java.lang.reflect.Method;
 
public class LogBeforeAdvice implements MethodBeforeAdvice {
 
    @Override
    public void before(Method method, Object[] args, Object target) throws Throwable {
        System.out.println("앞에서 실행될 로직");
    }
}


3. After returnning Advice

:: 뒷부분만 보조업무


1
2
3
4
5
6
7
8
9
10
11
12
13
package spring.aop;
 
import org.springframework.aop.AfterReturningAdvice;
 
import java.lang.reflect.Method;
 
public class LogAfterReturningAdvice implements AfterReturningAdvice {
    @Override
    public void afterReturning(Object returnValue, Method method, Object[] args, Object target) throws Throwable {
        System.out.println("returnValue:"+returnValue + ", method:"+method.getName());
    }
}


4. After Throwing Advice

:: 예외처리 보조업무


1
2
3
4
5
6
7
8
9
10
package spring.aop;
 
import org.springframework.aop.ThrowsAdvice;
 
public class LogAfterThrowingAdvice implements ThrowsAdvice {
     public void afterThrowing(IllegalArgumentException e)throws Throwable{
          System.out.println("예외가 발생하였습니다.:"+ e.getMessage());
     }
}


[ PointCut and JoinPoint and Weaving ]


< PointCut >

:: 기본적으로 Target으로 생각하는 내용이 있으면 Proxy는 Target을 대상으로 모든 메서드를 JoinPoint로 생각한다.

때문에 이를 개별적으로 설정할 수 있는 역할을 함.


* 방법 1

1
2
3
4
5
6
7
8
9
10
11
12
13
14
15
16
17
18
19
20
21
22
<bean id="classicPointCut" class="org.springframework.aop.support.NameMatchMethodPointcut" >
        <property name="mappedName" value="total"/<!--total메서드만 지정-->
    </bean>
 
    <bean id="classBeforeAdvisor" class="org.springframework.aop.support.DefaultPointcutAdvisor" >
        <!--포인트컷과 프록시를 연결해주는 역할을 advisor가 한다.-->
        <property name="advice" ref="logBeforeAdvice"/><!--setter인데 이름은 정해져 있다-->
        <property name="pointcut" ref="classicPointCut" /><!--setter인데 이름은 정해져 있다.-->
    </bean>
 
    <bean id="proxy" class="org.springframework.aop.framework.ProxyFactoryBean">
        <property name="target" ref="target"/>
        <property name="interceptorNames">
            <list>
                <value>logAroundAdvice</value>
                <!--<value>logBeforeAdvice</value>-->
                <value>classBeforeAdvisor</value<!-- advisor의 id를 적어준다-->
                <value>logAfterReturningAdvice</value>
                <value>LogAfterThrowingAdvice</value>
            </list>
        </property>
    </bean>


*방법2


1
2
3
4
5
6
7
8
9
10
11
12
13
14
15
16
17
18
19
20
21
22
23
24
//패턴없이 value값 넣는 방법 
 
<bean id="classBeforeAdvisor" class="org.springframework.aop.support.NameMatchMethodPointcutAdvisor">
        <!--포인트컷과 프록시를 연결해주는 역할을 advisor가 한다.-->
        <property name="advice" ref="logBeforeAdvice"/>
        <property name="mappedNames"<!-- 포인트컷 사용할 수 있는 value가 여러개일 경우 사용-->
            <list>
                <value>total</value>
                <value>avg</value>
            </list>
        </property>
        <property name="mappedName" value="avg" /<!-- 포인트컷 사용할 수 있는  value가 하나일 경우 사용-->
    </bean>
 
//패턴(정규식)을 이용한 방법
 
<bean id="classBeforeAdvisor" class="org.springframework.aop.support.RegexpMethodPointcutAdvisor">
        <property name="advice" ref="logBeforeAdvice" />
        <property name="patterns">
            <list>
                <value>.*to.*</value>
            </list>
        </property>
    </bean>
cs


< JoinPoint >

:: 연결할 지점(메서드 등..)을 의미함.


< Weaving >

:: 뜨개질처럼 서로를 연결해주는 과정을 의미함.

'프로그래밍 > Spring' 카테고리의 다른 글

Properties파일 읽기  (0) 2020.05.22
intellij Spring MVC & Gradle 프로젝트 생성  (0) 2020.05.22
Spring MVC & Gradle & Mariadb 연동  (0) 2020.05.21
SpringMVC_Annotation  (0) 2020.05.20
파일 다운로드  (0) 2018.10.24

[Annotation]


@Service ( import org.springframework.stereotype.Service; )

@Repository ( import org.springframework.stereotype.Repository; )

@Component ( import org.springframework.stereotype.Component; )

:: 클래스를 객체화( xml파일에서 bean객체로 생성하지 않아도 됨)

:: 그냥 쓰면 spring에서는 읽어들이지 못한다( xml에서 설정한 것이 없기 때문) 

:: xml에 <context:component-scan base-package="패키지명" /> 추가해야 해당 패키지를 뒤져서 객체를 찾음.

이거 선언하면 <context:annotation-config /> 없어도 됨. 

:: @Component("id값")을 입력하면 id값으로 getBean("id값")으로 객체를 찾을 수 있다.

:: @Component만 쓸 경우 getBean( 객체.class )를 사용하여 찾음


[ 종류 ]


1. @Controller

2. @Service

3. @Repository


:: 객체화 하고자하는 클래스가 어떤 역할을 하는지 명시화 할 수 있다.

:: @Component와 역할은 같다


@Autowired ( import org.springframework.beans.factory.annotation.Autowired; )

:: 참조할 수 있는 객체를 찾아서 바인딩 해줌.

:: 같은 객체를 두개 바인딩하면 에러가 나기 때문에 id를 부여해서 @Qualifier("id명") 를 써서 구분

:: setter, 기본생성자 위, 오버로드생성자 위 3군데에 붙일 수 있다.

:: 기본생성자 없이 객체 초기화 변수 위에 붙이는데 오버로드생성자가 있으면 에러가 난다. 

때문에 생성자가 아예 없으면 생성자 자동생성해서 에러가 안남

:: 오버로드 생성자 위에서는 @Qualifier가 에러가 난다. 그 이유는 파라미터가 몇 개가 올지 모르기 때문이다.

이때는 파라미터에직접 @Qualifier를 넣어준다.

:: xml에 <context:annotation-config /> 추가  


[ 속성 ]

required = false

:: bean객체가 없어도 일단 넘어갈 수 있게 하는 속성

:: 다음 코드에서 조건문으로 처리


@Transactional ( import org.springframework.transaction.annotation.Transactional; )

@Scope ( import org.springframework.context.annotation.Scope; )

@Value ( import org.springframework.beans.factory.annotation.Value; )

:: 기본 값 설정

@Configuration

:: xml파일을 지우고 자바로 xml파일을 대체하는 config클래스에 @Configuration을 붙여서 사용

@ComponentScan("패키지")

:: java config클래스 위에 붙임

:: 여러 패키지일 경우 java문법을 따라 {} 배열안에 넣어 사용

@Bean

:: java config파일 내에 객체 생성작업하는 코드 위에 붙임


[Spring Annotation]


@Controller ( import org.springframework.stereotype.Controller; )

@RequestMapping ( import org.springframework.web.bind.annotation.RequestMapping; )

@PathVariable ( import org.springframework.web.bind.annotation.PathVariable; )

@RequsetParam ( import org.springframework.web.bind.annotation.RequestParam; )

@ModelAttribute ( import org.springframework.web.bind.annotation.ModelAttribute; )

@SessionAttributes ( import org.springframework.web.bind.annotation.SessionAttributes; )


[Spring Security Annotation]


@PreAuthorize ( ( import org.springframework.security.access.prepost.Preauthorize; )


[ Xml 설정 ]


1
2
3
4
5
6
7
8
9
10
11
12
13
14
15
16
17
18
19
20
21
22
23
24
25
26
27
28
29
30
31
32
33
34
35
36
37
38
39
40
41
42
43
44
45
46
47
48
49
50
51
52
53
54
55
56
57
58
<?xml version="1.0" encoding="UTF-8"?>
<beans xmlns="http://www.springframework.org/schema/beans"
       xmlns:xsi="http://www.w3.org/2001/XMLSchema-instance"
       xmlns:p="http://www.springframework.org/schema/p"
       xmlns:util="http://www.springframework.org/schema/util"
       xmlns:context="http://www.springframework.org/schema/context"
       xsi:schemaLocation="http://www.springframework.org/schema/beans http://www.springframework.org/schema/beans/spring-beans.xsd">
 
        <!--<context:annotation-config />--><!-- 객체들이 annotation을 갖고있다는 뜻이니 찾아보라는 뜻 -->
        <context:component-scan base-package="spring.di.ui, spring.di.entity" />
 
 
        <!-- setter에 값을 넣는 코드-->
        <bean id="exam" class="spring.di.entity.NewlecExam">
        <property name="kor" value="10"></property>
        <property name="eng">
            <value>30</value>
        </property>
        <property name="math" value="40"></property>
        <property name="com"  value="50"></property>
        </bean>
 
    <!--생성자에 값을 넣어주는 코드-->
    <bean id="exam" class="spring.di.entity.NewlecExam" p:kor="10" p:eng="11" p:math="12" p:com="13">
 
        <!-- 생성자에 값을 넣어주는 코드
        <bean id="exam" class="spring.di.entity.NewlecExam">
        <constructor-arg name="kor" type="int" value="11" />
        <constructor-arg name="eng" type="int" value="11" />
        <constructor-arg name="math" type="int" value="11" />
        <constructor-arg name="com" type="int" value="11" />-->
    </bean>
 
    <bean id="console" class="spring.di.ui.GridExamConsole" />
    <bean id="console" class="spring.di.ui.InlineExamConsole">
        <property name="exam" ref="exam"></property><!-- setExam을 호출하는 이름을 입력하면 set은 프로퍼티로 대체하기에 생략-->
    </bean>
 
    <util:list id="exams" list-class="java.util.ArrayList"><!-- 실제로 객체를 만들수 있는 능력을 가지고 있다.-->
        <bean class="spring.di.entity.NewlecExam" p:kor="10" p:eng="11" p:math="12" p:com="13" />
        <ref bean="exam" />
    </util:list>
 
        <bean id="exams" class="java.util.ArrayList">
            <!-- 초기화된 컬렉션이 필요하면
            list형식으로 생성자에게 arraylist를 만들게 되면 변수.add하지 않아도 list의 두개의 항목이 추가됨-->
            <constructor-arg>
                <list><!--자체가 객체를 만들지 못하며, 목록을 셋팅할때 사용될 수 있음-->
                    <bean class="spring.di.entity.NewlecExam" p:kor="10" p:eng="11" p:math="12" p:com="13" />
                    <ref bean="exam" />
                </list>
 
            </constructor-arg>
        </bean>


</beans>
cs


* 여기서 xml을 불러오는 방식

1
2
3
4
5
6
ApplicationContext context =
                new ClassPathXmlApplicationContext("spring/di/setting.xml");
        /*ExamConsole console = (ExamConsole) context.getBean("console");*/
        ExamConsole console = context.getBean(ExamConsole.class);
        // 바로위의 결과와 같음 xml에서 bean객체를 id값 또는 클래스명으로 가져올 수 있다.
        // class로 가져오는 것을 선호


[ java코드로 config파일 만들기 ]

:: xml을 없애고 Annotation과 java만으로 config파일을 만들어 xml파일을 없앰


1
2
3
4
5
6
7
8
9
@ComponentScan("spring.ui")
@Configuration
public class JavaConfig{
    
    @Bean
    public Exam exam(){ // exam()은 xml에서 id와 같은 역할
        return new NewJavaExam(); //     
    }
}    


* java config클래스 가져오는 방식


1
2
ApplicationContext context = AnnotationConfigApplicationContext(NewlecAppConfig.class);
        ExamConsole console = context.getBean(ExamConsole.class);


* config파일이 여러개일 경우

:: register함수를 이용해 여러 config파일을 설정할 수 있다.

1
2
3
4
5
6
ApplicationContext context = new AnnotationConfigApplicationContext();
ctx.register(NewlecAppConfig.class);
ctx.refresh();
ExamConsole console = (ExamConsole) context.getBean("console");
console.print();
        }


'프로그래밍 > Spring' 카테고리의 다른 글

Properties파일 읽기  (0) 2020.05.22
intellij Spring MVC & Gradle 프로젝트 생성  (0) 2020.05.22
Spring MVC & Gradle & Mariadb 연동  (0) 2020.05.21
Spring_AOP  (0) 2020.05.20
파일 다운로드  (0) 2018.10.24

+ Recent posts